Photography is an oddity among traditional art. Everybody with a smartphone has access to a decent camera, but it’s still easy to tell amateur from professional. The technology behind photography has evolved while other mediums like painting have not. And while anyone can point their camera at a flower and capture it, only someone with a certain level of expertise can account for storytelling through composition, color, lighting, and clarity. While the list of photography techniques is substantial, we’ve detailed some that you will find useful.
MACRO

If you’ve ever wanted to recreate the close-ups of small objects seen in textbooks and movies, macro photography has you covered. It is a bit of an investment, compared to other techniques, however. A macro lens or extension tube is needed to capture the extreme detail of the subject. A tripod is also recommended, although these can be found anywhere. The end is a detailed look at something we normally don’t get to see. Many professionals use the technique to get a better view of insects or other animals. But it’s better to start with still objects before moving to wildlife.
HIGH-SPEED PHOTOGRAPHY

It’s one thing to capture a moment in slow-motion, another to create a still of the exact moment of impact. High-speed photography is the ideal way to see something too fast for the naked eye, which is why it’s popular with scientists and artists alike. Equipment-wise, it’s fairly simple: a macro lens, a tripod, a good flash, and plenty of patience. The key is to take your time. Even if you capture the exact moment you’re looking for, it still takes a careful eye to transform it into a masterpiece. Experimentation may be required, hence the waiting game.
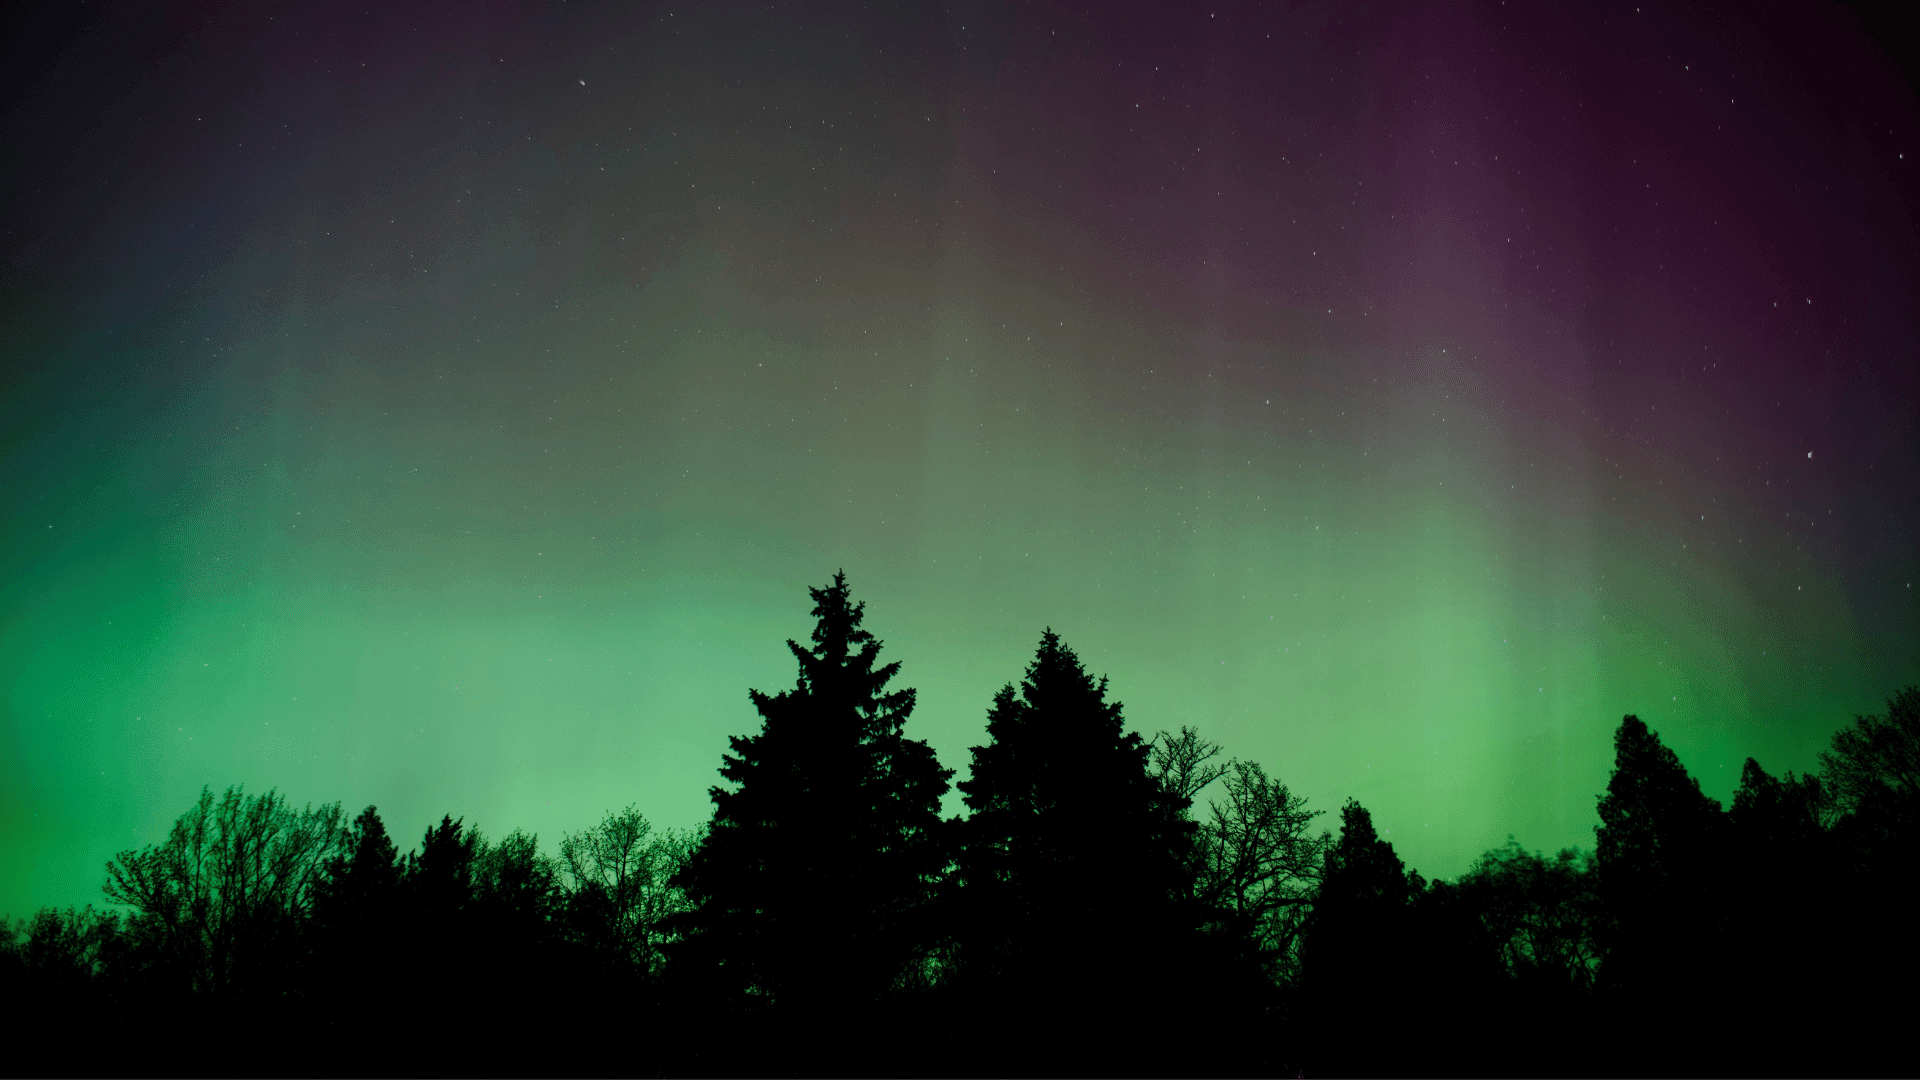
LONG EXPOSURE

On the opposite end of the spectrum is long exposure photography. Unlike high-speed, this is for capturing several moments into one image. It looks like motion blur (detailed below) but doesn’t involve the photographer moving. It’s also incredibly simple to pull off. By adjusting the shutter speed, you can create exposure that lasts up to 30 seconds. The longer the exposure, the more blurred moving objects will become, while stationary objects become crisp and clear. It’s particularly common for nighttime photography, especially of highways or starry skies.
MOTION BLUR

At first glance, it’s easy to mistake long exposure and motion blur. Both feature, well, blur, and have slower shutter speeds compared to other techniques. But motion blur requires the person operating the camera to move at the same speed as the subject. This creates the illusion of movement in the image itself without the subject being out-of-focus. Sports journalists naturally use this technique a lot. It’s also a skill those who take panorama shots find useful. It’s not the easiest to pull off, especially at higher speeds, but the results can be fascinating.
SILHOUETTES

For an other-worldly or mysterious look, try framing your subject in silhouette. The style, which has been around since the 18th century, is named after a French prime minister. When light filters against an object, the side away from the light naturally looks darker. By posing your subject between a light source in the background and a dark foreground, it creates the illusion that the subject is their own shadow. It’s a good way to practice with white balance, too. It’s not the most popular technique, but one any photographer should have on standby.
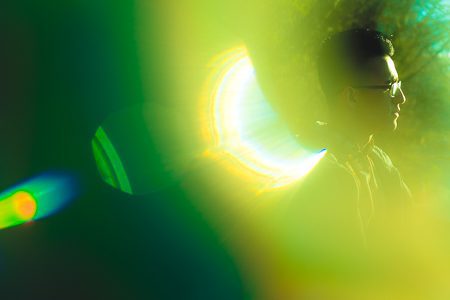
LIGHT PAINTING

Fun fact: the word “photography” comes from the Greek words “phos” and “graphe” (“φωτός” and “γραφή” respectively), meaning “drawing with light.” No wonder light painting is such a popular technique! It’s incredibly easy and produces some stunning results. Using the long exposure method above, it’s possible to create the illusion of a light source moving in a certain pattern. Waving a glow stick back in forth, shining a flashlight between two trees- as long as the light source is something you can control, you can paint whatever captures your fancy. Just keep in mind that light painting only works in a dark place. Most professionals also recommend a tripod, due to using long exposure.
EVERYDAY ITEMS
This is less of a “technique” and more a guide on how to use items around the house to create some beautiful effects. Have a few beads from Mardi Gras laying around? Drape them in front of the camera’s lens and experiment with aperture. Results range from light refracting off the beads to the shapes and colors being overlaid on the shot. A metal tube can be used to create a “ring of fire” around your subject. If you still have CDs or DVDs, they can reflect light in colorful ways. It’s all about manipulating natural or artificial light to your advantage.
What photography techniques do you like the best? Are there some we missed? Let us know on Facebook